This chapter contains the following topics:
Printing and Purging Extended Fields
Use this selection to tailor Payroll for the types of information you require. This is useful when additional fields are required for quarterly or annual state electronic reports. Although this facility is provided primarily for electronic file reporting, you may also find this useful for storing additional information about employees.
For instance, one state requires you to identify in your quarterly unemployment insurance report those employees who are officers of the corporation. Another state requires separate fields for employee first name, middle initial, and last name. There are other instances of irregular data that are reported to states electronically.
It is important to distinguish between defining what kind of extended fields you want and what data you want to put into those fields:
| • | Extended fields for both employer and employees are defined in this selection. |
| • | Employer-related extended data is entered via Control information menu selection, located under Master information. See Extended Employer Fields in the Control information chapter. |
| • | Employee-related extended data is entered via Employees. Whatever extended fields you define are available for all employees. You cannot for instance define one set of fields for hourly employees and another for salaried employees. However, all extended fields are optional, so for each employee you need to enter only the fields that are meaningful for that employee. Se the Extended Employee Information section of the Employees chapter |
Here is what you can specify for each extended field:
| • | Field number |
| • | Field name |
| • | Field type (alphanumeric, numeric, or date) |
| • | Field size |
| • | Default that automatically displays in this field and can be selected by <Enter> (like any other default) |
| • | Prompt that displays at the bottom of the screen during entry of the field |
Extended fields are entered the same way for employees and for employers. You can define up to 36 extended fields for each. They are not numbered from 1 to 72. Each group is separately numbered from 1 to 36.
In order to make efficient use of space, a single extended field (if alphanumeric) is allowed to span two normal fields. This allows a single field to contain fifty (instead of twenty-five) characters. It does however impose certain restrictions, which can be illustrated by two examples:
| • | If extended field #3 is a double-length field, extended field #4 is not available. Extended field #5 is available, and can be either a normal or a double-length field. |
| • | If extended field #11 and extended field #14 are both double-length fields, extended field #13 is available but can be only a normal-length field. |
There is no requirement that double-length fields be either odd-numbered or even-numbered.
When a double-length field is purged, the space that is freed can be used either for another double-length field or for two normal fields. Or it can simply be left unused — fields are not required to be numbered consecutively. Gaps in the numbering sequence are not closed up when a field is purged. However, these gaps are not apparent to the operator who is using the Employees selection or the Control information selection, because the extended fields are identified only by their description, not their numbers. Undefined fields are not displayed.
Select
Enter from the Define extended fields menu.
The following screen displays:
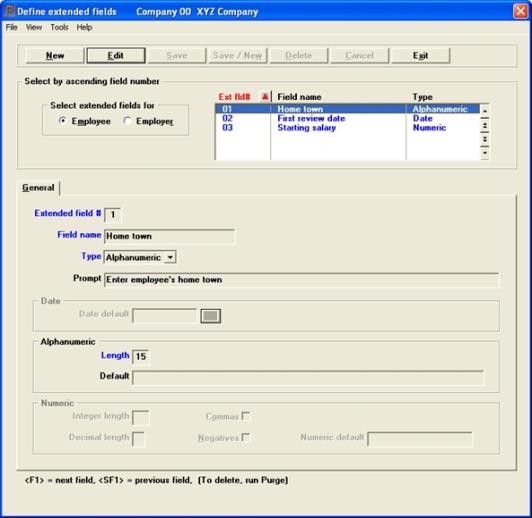
Graphical Mode
You may define with an employee or employer extended field on this screen.
| Button | Keyboard | Description |
| New | Alt+n | To enter a new extended field definition |
|
Save |
Alt +e |
To edit what was entered or changed on a field. |
|
Exit |
Alt +x |
If no field changes or new entries were made, you will be returned to the screen.
If you made any changes, a Cancel Entry? message will display. If you select Yes, any changes will be abandoned. If you select No, you will return to the last field you edited. |
|
Cancel |
Alt +c |
Discard what was entered/changed. |
Character Mode
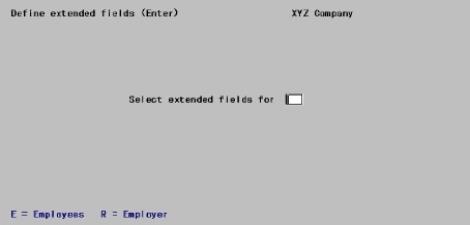
Using character mode two screens are required. You begin by specifying whether you want to work with employer fields or employee fields. You can then use the second screen to access as many extended fields as you wish (each screen represents a single extended field). Press <Esc> from the second screen to return to the first screen. Press <Esc> from the first screen to the main menu.
Enter the following information.
Enter E to work with employee extended fields, or R to work with employer extended fields.
|
Format |
Graphical: radio buttons. Use your right and left arrow keys to select a button Character: One letter, either E or R |
|
Example |
Type R |
Character Mode Only
Any change ?
Answer Y to re-enter the screen, or N to continue to the second screen.
The following screen displays:
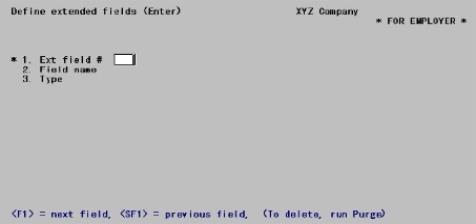
From this screen you can work with both new and existing entries. Enter the following information:
Options
Enter the number of the new or existing extended field you want to process. You can also use one of the options:
|
<F1> |
For the next existing extended field definition (not the next number) |
|
<SF1> |
For the previous extended field |
You cannot enter a number above 36, nor one that is already in use as the second half of a double-length field.
|
Format |
99 |
|
Example |
Type 1 |
Enter a descriptive name for this extended field. This name is used in screen displays and on reports to identify the information you enter for this extended field.
|
Format |
20 characters |
|
Example |
Type First name |
Enter the type of information that you want to enter in this field: Alphanumeric, Numeric, or Date.
|
Format |
Graphical: Drop down list Character: One letter, either A, N, or D. |
|
Example |
Type A |
Enter the prompting message for this extended field. This message displays at the bottom of the screen during data entry of this extended field. The message should describe what is to be entered for this extended field, and can include a brief list of allowable codes.
|
Format |
60 characters. Prompts are optional and can be omitted. |
|
Example |
Type Enter employee’s first name |
Field Definitions
Depending on the type of field selected, the next set of fields allows you to define the characteristics of this extended field by entering one of more subfields. These are listed below. Which subfields are enterable depend upon what Type you entered.
On an existing entry, the only one of these subfields that you can change is the Default. Thus there is no possibility of leaving invalid data on file for an employee (or for the employer) when a field is changed (for instance, from alphabetic to numeric). If you need to remove a field definition and contents, see Purging Extended Fields.
[Alphanumeric field only] Enter the number of characters you want to enter in this field.
|
Format |
Any number from 1 to 50. An entry greater than 25 defines this as a double-length field (described in the introduction to this section). |
|
Example |
Type 25 |
|
Note |
PBS does not allow you to modify the field Type or Definition Length for an extended field once it has been entered. This is control feature that prevents you from modifying or deleting data that already has been entered that exists in the defined fields. You can remove a field and all entered data, if it exists, by using the purge function. Then you can re-enter the field. |
[Numeric field only] Enter the maximum number of integers (digits to the left of the decimal point) to allow in this field.
|
Format |
Any number from 0 to 12. |
|
Example |
(This subfield does not appear in this example) |
[Numeric field only] Enter the number of decimal places (digits to the right of the decimal point) to allow in this field
|
Format |
Any number from 0 to 5 |
|
Example |
(This subfield does not appear in this example) |
[Numeric field only] Check the box or enter Y if commas are to appear in a number when it displays or prints. Commas appear at every third digit. For instance, a checked box or Y means that an entry of 1234 will display and print as 1,234; an unchecked box or N, as 1234.
|
Format |
Graphical: Check box where checked is yes and unchecked is no Character: One letter, either Y or N |
|
Example |
(This subfield does not appear in this example) |
[Numeric field only] Check the box or enter Y to allow negative number entry. If you leave it unchecked or enter N, negative numbers are not allowed.
Zero entry is always allowed.
|
Format |
Graphical: check box where checked is yes and unchecked is no Character: One letter, either Y or N |
|
Example |
(This subfield does not appear in this example) |
Date default or Default or Numeric default
[All types] Enter the default which you wish to appear in the field during data entry
When you are defining a new extended field, do not assume that the default is propagated into every occurrence of that employee (or into the single occurrence of the employer). It is still necessary to update each record individually; however, the operator can ratify the default merely by pressing <Enter>. Once a non-blank value has been entered into a field, that value (not the default) displays in that field the next time that employee or employer entry is viewed.
Options
[Date field only] You can use the option:
|
<F2> |
During data entry the current system date displays as the default. |
|
Format |
Any text consistent with the defined format and length of the field (for instance, MMDDYY for a date). Defaults are optional and can be left blank. |
|
Example |
Press <Enter> |
Click on the Save button or select Alt+s to save your entry or click on the Cancel button or Alt+c to cancel.
Character Mode
Field number to change ?
Options
Make any desired change. For an existing entry you can also use one of the options:
|
<F1> |
For the next existing entry |
|
<SF1> |
For the previous existing entry |
Note the absence of <F3>. To delete an extended field definition, use the Purge function described later in this chapter.
This section explains how to print a list of extended fields, and how to purge them.
Select
Extended field definitions from the Reports, Employee/Employer menu.
Only the printer selection screen displays because all extended fields, both employee and employer, are printed unconditionally.
Use this function to delete any extended field that you no longer need.
Purge does not imply that all extended fields are deleted. The selection is called purge rather than "delete" because it does not merely delete the definition of a field — it removes the contents of that field from each employee’s record (or from the Control information record, in the case of employer data).
Select
Purge from the Define extended fields menu.
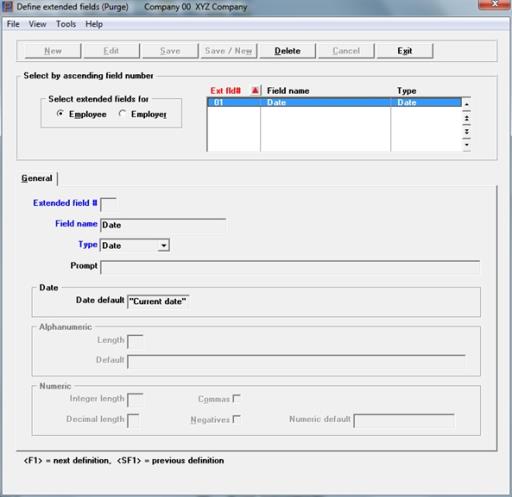
The following screen displays:
Graphical Mode
| Button | Keyboard | Description |
| Delete | Alt+d | To purge an extended field definition including the data entered in the field |
|
Exit |
Alt +x |
To exit the program. You may also use the <Esc> key |
|
Cancel |
Alt +c |
Discard what was entered/changed. |
No other buttons are active on this screen.
Character Mode
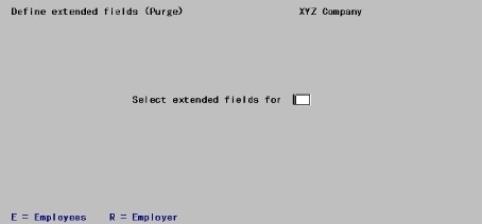
In character mode two screens are required: You begin by specifying whether you want to work with employer fields or employee fields. You can then use the second screen to access as many extended fields as you wish (each screen represents a single extended field). Press <Esc> from the second screen to return to the first screen. Press <Esc> from the first screen to the main menu.
Enter the following information:
Enter E to work with employer extended fields, or R to work with employer extended fields.
|
Format |
Graphical: radio buttons. Use your right and left arrow keys to select a button Character: One letter, either E or R |
|
Example |
Type R |
Any change ?
Answer Y to re-enter the screen, or N to continue to the second screen.
The following screen displays:
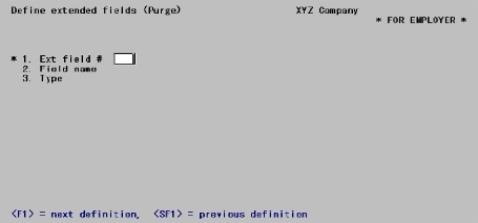
From this screen you can work only with existing entries.
Enter the following information:
Options
Enter the number of the extended field to be purged, or use one of the options:
|
<F1> |
For the next existing extended field |
|
<SF1> |
For the previous extended field |
You cannot enter a number above 36, nor one that is already in use as the second half of a double-length field.
Be careful not to purge any field while there is any format still using that field in either Magnetic media formats or Quarterly report formats.
|
Format |
99 |
|
Example |
Type 1 |
Field name
Type
Prompt
Date, Alphanumeric and Numeric sub fields
These fields display for your information, and have the same meaning as the fields of the same name in the Enter screen. The cursor does not move to them and you cannot change these fields from this screen.
Graphical Mode
A message like the following will display:
Warning! All data for this extended information field will be removed. This function may take some time to complete. Are you sure you want to do this.
Select Yes to purge or No to keep the data and return to the previous screen.
Character Mode
Ok to purge ?
Options
Answer N to re-enter the screen, or Y to purge the extended field definition. There will be a period of processing as purging occurs. No purge report is printed. You can also use one of the options:
|
<F1> |
For the next existing entry |
|
<SF1> |
For the previous existing entry |